EMS
| Català | Castellano | English |
Student portal access and activation guide
This guide explains in detail the steps students (or their families) must follow to activate their account and access the school’s educational portal for the first time.
Table of Contents
- Introduction
- Step 1 — Email invitation instructions
- Step 2 — Password form
- Step 3 — Confirmation email
- Step 4 — Portal access
- Step 5 — Answering an authorization
- Signing in afterwards: personal email or school account
- Students under 18
- When the student turns 18
Introduction
The student portal is the centralized virtual space from which the student and their family can manage their academic and administrative life with the school in a simple, fast and fully online way.
Currently, the portal allows the following tasks:
- Attendance: Check the student’s weekly class schedule and download it as a PDF.
- Enrollment and authorizations: Manage the enrollment process, review payments or fees, and answer and sign the school authorizations digitally — both the ones that come with the enrollment and the ones the school sends during the course.
- Convalidations: Request the convalidation of vocational training modules and follow the resolution. See Requesting convalidations.
- Documentation: Upload, store and consult all the official documents requested by the school.
- Communications: Receive messages, circulars and notices sent by the management team, tutors or the secretariat immediately.
- Profile: Keep the personal, contact and account security data up to date.
Features available soon. We are developing new modules to improve the tool. The following area will be activated very soon:
- Grades: Access the marks of the different evaluations directly.
Step 1 — Email invitation instructions
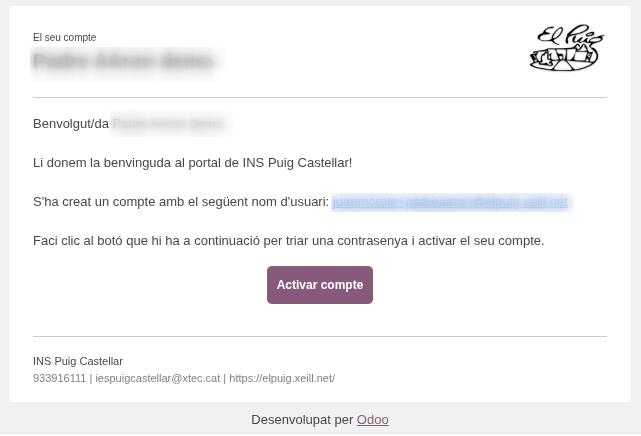
When the school registers you in the EMS management system, you will receive an automatic invitation email at the email address you provided during the enrollment process.
To start the activation process, follow these steps:
- Open your email client and look for the welcome message sent by INS Puig Castellar.
- Check that the username shown matches your correct email address.
- Click directly on the central Activate account button. This link will securely redirect you to the portal setup wizard.
Step 2 — Password form
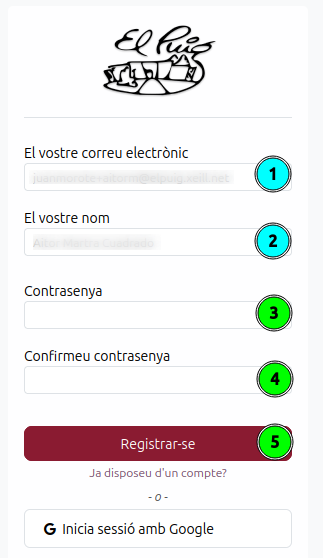
Once you open the link from the email, the school’s official registration window will open automatically so you can set up your security credentials.
In this form, complete the following actions following the numbered indicators in the image:
- Your email (1): Check that the email address is correct. This field acts as your unique user identifier by default.
- Your name (2): Check that your name and surname appear.
- Password (3): Type a new, secure password for your account.
- Confirm password (4): Re-enter exactly the same password to make sure there was no typing error.
- Sign up (5): Finally, click the maroon Sign up button to validate and save your access data.
Step 3 — Confirmation email
After submitting the registration form correctly, you will receive a second automatic email in your inbox from the system.
This message officially confirms that the registration process has been completed successfully, that your user profile is now active and that you have been granted all the permissions to access the platform independently.
Step 4 — Portal access
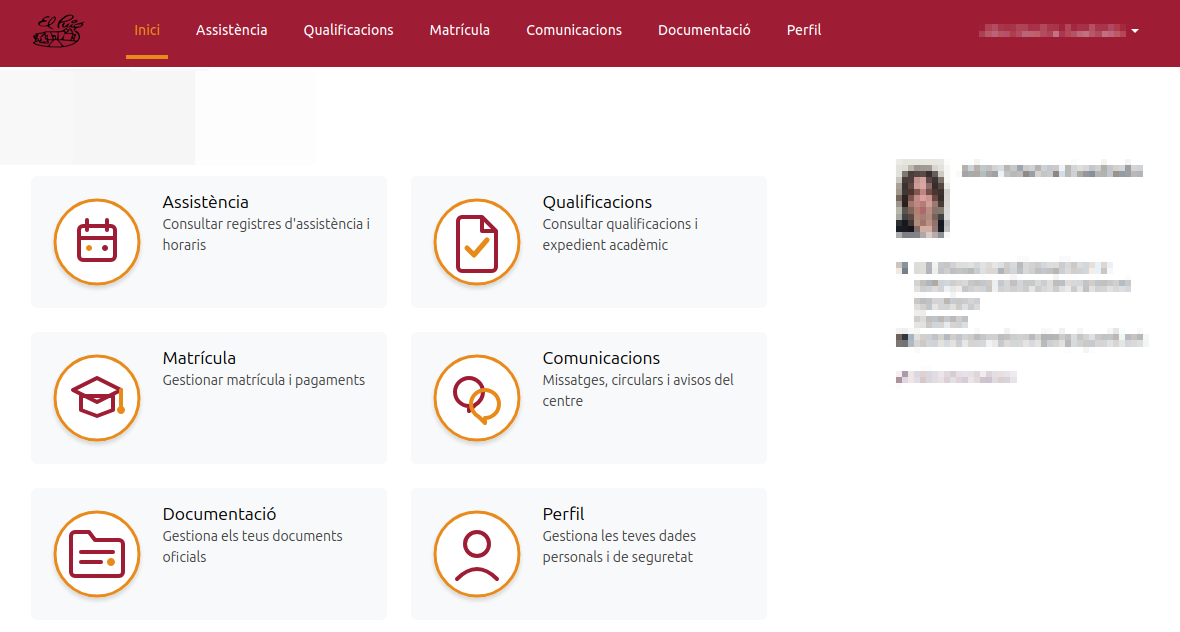
Once registered, you will go directly to the main dashboard or home page of the student portal.
The web interface is optimized and designed to provide clean and intuitive navigation:
- Top menu: You have permanent access to all the school’s management areas.
- Centralized cards: You have visual buttons to access each of the key services (Attendance, Grades, Enrollment and authorizations, Convalidations, Documentation, Communications and Profile).
- User profile: On the right side you will always see the basic information of the active student profile along with their ID photo from the record.
Step 5 — Answering an authorization
New authorizations may arrive during the school year: a museum visit, an outing agreed in a tutoring meeting, a form published by the Departament d’Educació. You will receive an email listing them, with a link to the portal.
Open Enrollment and authorizations from the top menu. The authorizations appear in their own block, whether or not the enrollment for that year is already confirmed.

For each one:
- Check the Status column: Pending means it is waiting for your answer.
- Click Respond. A window opens with the full text of the authorization.
- Fill in any data the school asks for. The fields marked with an asterisk are required to accept.
- Click Accept Authorization or, if the authorization allows it, Reject.
Once answered, the Document column holds a PDF certificate of your answer. Click it at any time to download or print it.
Signing in afterwards: personal email or school account
Students can open the portal in two ways, whichever is more convenient:
- Personal email and password: the email address the invitation was sent to, and the password set in Step 2.
- School account (
@elpuig.xeill.net): on the sign-in page, click Log in with Google and choose the school account. No portal password is needed.
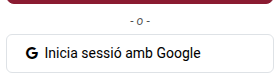
Both ways open the same portal. If you have lost your portal password, the school account is usually the quickest way in. If you have also forgotten the school account’s password, follow the guide to recovering the school email password.
The school account only works once the student has one (it is created when they enroll) and has already been given portal access. Families always sign in with their own email and password.
Students under 18
While a student is under 18, their family manages everything from its own account. The student can have a portal account of their own too, to check:
- Attendance (their schedule),
- Communications addressed to them,
- Profile.
Enrollment and authorizations and Documentation do not appear in the student’s own account: the family handles them. Under Convalidations the student checks their requests, but the family files them. When the student turns 18, all sections become available to them.
When the student turns 18
From the day the student turns 18, they manage everything from their own account: enrollment, authorizations, convalidations and documentation. If they did not have a portal account of their own yet, ask the tutor or the Secretariat for one.
The family keeps its account but no longer sees the student on the portal, unless the student authorizes sharing their information with the family (the share with the family authorization). In that case the family can consult again the student’s Attendance, Grades, the Communications addressed to them and the Profile, but it can no longer manage enrollment, authorizations or documentation, which stay with the student. It can still file and follow the student’s Convalidations.
A family that has no student left to see finds a notice on the portal home explaining it.